What kind of knitter...? (Quiz)
What Kind of Knitter Are You?

Take this quiz!
***
***

***
***
Dearest friends!
 to Switzerland, and I am so nervous about it! I am not sure when I'll have an Internet connection there, or when I'll have enough time to knit again there. I'll receive my knitting needles and some yarn later during October, so I won't even have my tools inmediately. Will I be able to cope? :)
 learned a lot from this book, and this scarf looked like something I would have loved to do. I thought I'd mix two colours for this one, and... why not the Swiss national colours, red and white? Well, here they are. I loved the pattern. I was amazed at the result. It is so... WAVY! I didn't think a few k2tog, ssk
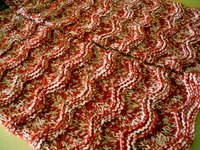 and such would SHAPE so much. Isn't it incredible? The scarf had to be "built" in two parts. The central part is a 2x2 rib that would hug the neck. There goes the seaming, of course. The ribbing had to be done with smaller needles (I used 6mm for the waves and 5.5mm for the ribbing... I didn't have 5mm needles, but I bought them yesterday anyway!).
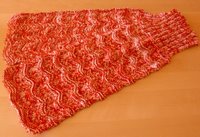 he neck part, and one won't notice from a certain distance. Good. At least I could finish the scarf today, so I can focus on preparing my suitcases! :) Notice the lovely details in the photographs. Doesn't it look huggable
 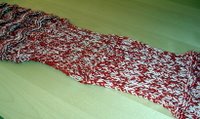 and very chic at the same time? Unfortunately the photo cannot get the real feeling of the scarf in the "real" world. It is... sooooooo lovely! It's probably one of the favourite objects I have ever knitted. I feel so proud! And it really covers your neck! Wow! :)
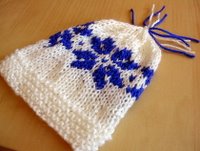 the practice, but I did a really small hat (probably good only for a really small newborn!) Anyway I considered it an exercise, so I am not too worried
 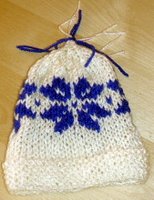 about giving it out as a gift. Isn't blue over white lovely? The flower design is from Knitting for Dummies as well. I hope you like both things. Would love to read your comments before I leave... sigh! I will miss you all! Really! I hope to be back very soon with more projects and more yarn!
Wow, dear friends.
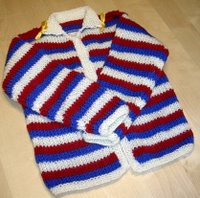 This has been a real torture. I had to rip off and re-do the collar three times because I wasn't able to pick up stitches properly. The cast-off edges tended to break at the same time and it all went CRAZY. I can't believe I had to patience to finish the work.
 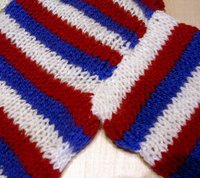 Front bands were a nightmare too. Really. I had this idea of doing buttonholes. This made the fabric to pull in and the colour striped didn't match at all, it was so frustrating (must be because of the yo/k2tog thing or something... or simply because the MC yarn is, inexplicably, thinner than the CC yarns!). After 3 trials, I decided to make blank front bands, with just... nothing. So, the jacket remains open. Sorry... :(
 Anyway, I am happy about the sleeves. This is the first time I have to sew whole sleeves in the armholes. I had a stressful time figuring out how it would look like, because there were obviously MORE stitches in armholes than in the sleeve's top edge! But it worked, thankfully.
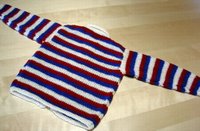 Well, this is the result. I hope you like it... now I have to find a child to give it too. The size is supposed to be 4 (4 year old?) - but isn't it a bit small? I am not sure. Anyway... here it is! Would love to hear your comments!
Dear friends
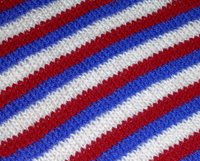 I hope all is well with you. I have been a bit silent lately because I am planning my departure and I am so nervous! But I knitting like crazy, as I told you previously. I wanted to do something difficult before parting, because I am not sure if I'll have my knitting needles with me inmediately. It depends on what I can pack in my suitcase... Argh :) Now, back to the project. I found this wonderful pattern on Bernat's website. I never thought I could do one of these, when I first signed up to access the patterns... but hey, it looks like I can, now! I am improving! Yeahhhh ;)
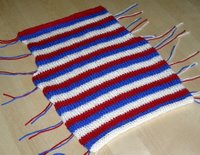 The first problem came with the stripes. The pattern asked to carry colours up the work sides instead of cutting the yarn, but I haven't been able to do this, because the fabric pulled in too much or either was too loose! I'll have to practice this. So, I decided to cut the yarn each time. This means now I have to weave in everything... or to make strong knots and snip with scissors... hehehe ;) The "Stripe Pattern" says: 3 rows in MC, 3 in CC1 and 3 in CC2. I thought... if I want white to be my main colour, why not giving it one more row? I am not sure this is correct, but that's what I did. 4 rows in white, 3 rows in blue, 3 rows in red. The jacket has a garter edge to it which must be knitted with smaller needles. In fact the patterns says you need two sets of needles: 4.5mm and 5.5mm. Another problem! My 5.5mm were being used for the Ocean Ribbing Scarf, so... I used 6mm! Luckily the result is not too bad!
 The back looks very nice. The front sides involved some shaping, at the same time as the stripe pattern. I had to calculate when to change colours AND when to increase or decrease... wow. It was exhausting! The problem came with the sleeves. I always forget to change to big needles after the garter edge, so ruining the beginning every time. Frustrating! Also, it was very exhausting to count rows for the increases. It said: increase at each end of needle on 5th row, then 3 times on every other 4th row, then 3 times on every other 6th row. Yeeeeeeeeeew! Did I have to count! I had to unravel a whole sleeve because I misread the pattern (at
 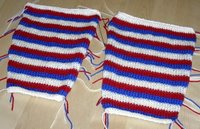 Well, here are the parts. I hope you like the result! It looks so 80s... I love it :) Now comes the difficult part. My book says I have to weave in ends and block BEFORE seaming. Good... but this is acrylic, and I have read I can't steam-block synthetic yarns! Does this mean I have to wet-block with a simple water-spray bottle? I have never done this before, so... I am a bit nervous. The last phase will be picking up stitches to do the collar and the front bands. It say I have to sew a zipper but I have no idea how to do that. Maybe I should do button holes instead? I am not sure... would love to hear your suggestions...
Dear friends,
 Here I am again - well, I am knitting like crazy lately! Must be because I am nervous about leaving for Switzerland and I am trying to get some distraction. Well, two friends of mine wanted me to knit two little hats for them. I think they wanted something more "winter-like", but I have discovered the yarn is a bit too soft and maybe they'll suffer some cold temperature with those. Luckily it never snows here. Christina wanted a plain white hat,
  no cables, no nothing. Not even an i-cord on top! Well, I hope she won't mind the ribbon ;) Monica wanted a pink hat. Since they didn't want anything special, I just recycled an old easy pattern: some garter stitch on edge, then all stockinette stitch and some decreasing. That's it... Seaming is better now :) Good, that means I am improving, I guess! :-)
 peppermint in it. Wow! I took some loose yarn I had in my closet, a chunky purple one, I cast on 18 stitches or so, and began with some garter stitch. Then, I left a garter edge and tried to do a heart in purl stitches against stockinette stitch. Then, I seamed and finished it. I didn't seam all the border, so I could leave a hole to put the peppermint inside!
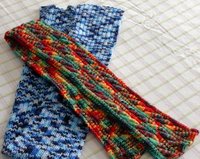 I have finally been able to finish my first two scarves! One of them is the Irish Hiking Scarf we all are doing on the Knitalong blog. I hope you like it! I chose a very colourful yarn and the result is lovely. I call it "rainbow cables" :) Also, I finally was able to finish the ocean ribbing scarf (a simple 2x2 ribbing, lovely touch, it looks soooo soft!). The Ocean ribbing scarf is a present for my special one. I'll use the Irish Rainbow cable scarf in Basel, for the cold winter :)
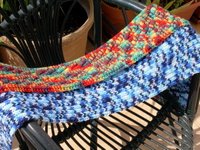 Maybe they are a bit short (more or less 130cm) but it's ok :) I have used exactly two balls for each scarf. Good to know for other projects! I would love to do the matching Irish Hat with cables but the pattern I found is not clear... any clue?